


Gliding on the foil
Welcome to your first day on the water! Today you're going to learn the first step of the knee start — pushing off the dock and gliding over the water on one knee. You'll get your first sensation of flight, and start to feel how the foil supports your weight above the water. In the next lessons you'll learn to stand up and then to start pumping. This lesson can take anywhere from 5 to 50 attempts before it really clicks.
The Knee Start
We always teach the "knee start" to new riders for two important reasons:
- We find it to be the easiest and safest way to learn.
- When it comes to launching from rocks and other challenging features along the shoreline, the knee start is absolutely the most powerful launch technique in your toolkit. By the time you reach 1-minute of flight you will be a pro knee starter, ready for the next step in freefoiling.
Dryland Practice - Body Position
The goal of this exercise it to feel how far forward you need to be in order to balance your weight on top of the foil. Before assembling your foil, lay the board down on a rolled up towel as shown. Kneel on the board with one knee so that your foot is just touching the back and hold the board near the front with both hands. In this position, practice shifting your weight forwards and backwards to get the board to pitch up and down. This is how you will control the angle of the board once you're flying.

Mast Position
Mount your mast at the back of the foil tracks as shown. This makes it easier to get your weight far enough forward on the board when you're first learning. Later on you can move it to the middle of the tracks so that the board floats better upside down, making it easier to exit the water on difficult terrain.

Hand Positions
As you lean onto the foil you'll need to move your hands from a split position to having both hands on the nose of the board as shown in the video below. The first position allows you to easily hold the board before the launch. The second position makes it easier to get your weight far enough forward when you land on the board.
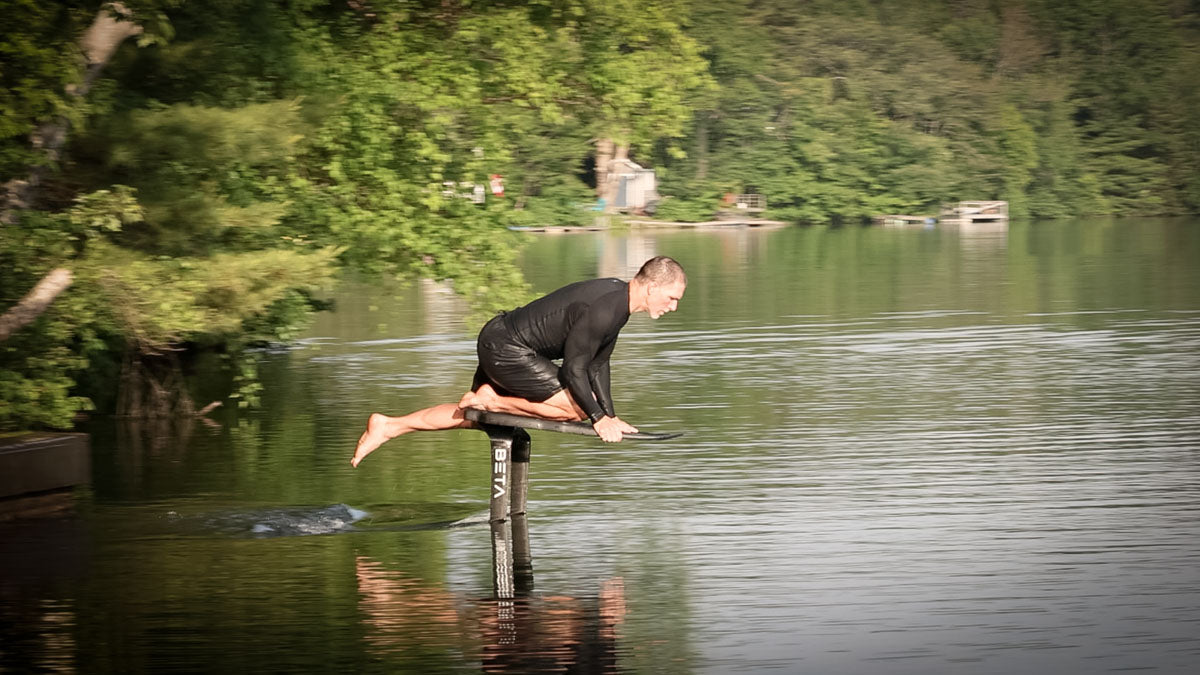
Taking Off
Now it's time for your first leap! First, be sure that you have at least 1.5 meters of depth off the dock or there is a high chance of getting hurt and breaking your foil. Next, there are four things you need to do to make a successful glide:
-
Level the wings: If you want to fly straight, the wings need to start level. Come back to this point later if you find yourself veering off to the side.
- Get the board to the right angle: Lean forward onto the board and, as you do, use your hands to get the board to the proper angle for your glide. The board should be pointing slightly downwards by the time you land on it.
-
Add speed: Your goal here is to add forward speed so that the foil creates lift. The best way to do this is to start with your toes hanging over the edge of the dock, and lean your body forward onto the foil before pushing off. You're trying to push yourself forwards, not jump up.
- Get your weight on center: once you're flying you control the angle of the board by moving your weight forwards or backwards. If you're nose diving, move back; if you're pitching up, move forward.
Make sure to take video of your attempts. Compare them to the video above and try to pick out which of the 4 things above isn't happening the way it should.
Also note, it's much safer to get your weight too far forwards than too far back. If you're too far forwards you just splash down with the foil safely behind you. Too far back and the stalling wing can kick you off in unpredictable ways.
Extending Your Glide
The perfect glide involves flying the board at a fixed angle, maintaining your speed while slowly losing altitude until you splash into the water. Most people will naturally lean back to keep their altitude, but then you lose speed and stall the wing. Keep leaning forward to keep your speed and extend your glide.
Once you can consistently glide for 10 meters, congratulations, you've hit your first milestone and you're ready for the next lesson!
Other Resources
- Roam Foils Knee Start Lesson: Toni teaches a very similar technique in this video, with good visuals.
-
Wake Thief Knee Start Video: Devon shows a similar knee start, but landing on the opposite knee and getting up with his back leg first.